| The time has come to render my drawings. I conducted both workshop 6 and 7 on my model for Assignment two because I found it to be more relevant to my work at that stage in time. Step One: Firstly, in order to easily render all like materials is to make sure that all objects are either in their own level or with other like objects. For example, I made all of my door handles on the level aluminium. Step Two: Secondly, in order to get views to start rendering, I had to learn about the view control and how to manoeuvre the walk tool in order to get inside the model from a reasonable angle. Step Three: Lighting is probably one of the most important parts of the rendering process. It is important to get the lighting right so that shadows are cast in the correct places on the model. For example, when adding the solar light which refers to the sun, it is ideal to have the light coming from through a window rather than from an empty space on your model where perhaps there would be another room. Step Four: Now to begin a draft of the luxology render. This does not look like the final renders as there are no materials assigned as yet. This is more of a play on the lighting and seeing how the shadows are cast within the model. Step Five: Because my space is interior it was necessary for me to play around with the flashbulbs as well to give light from the inside. | 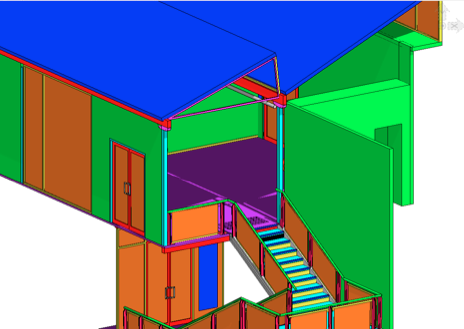 Above and below are the results of a draft render. Each show the effects of the light through the shadows.  |
